Server 2008 초기 설정

원문 출처 : http://blog.naver.com/code98/90029402442


실행창(RUN)열기 -> 윈도우키 + R
명령어 입력.


1. CTRL+ALT+DEL 누르지 않고 윈도로그온
실행창에 gpedit.msc 입력
Computr Configuration -> Windows Settings -> Security Settings -> Local Policies -> Security Options
‘Interactive logon: Do not require CTRL+ALT+DEL’ Disabled -> Enabled

2. 시스템 종료시 이벤트 메시지 보이지 않게 하기
Computr Configuration -> Administrative Templates -> System
‘Display Shutdown Event Tracker’ Not Configured -> Disabled

3. 테마 및 사운드 활성화
실행창에 services.msc 입력
Themes : Disabled -> Automatic
Windows Audio : Manual -> Automatic

————————————————————————————–

3. 인터넷익스플로러 보안설정
Start -> Computer 우클릭 -> Manage
Server Summary -> Security Infomation -> Configure IE ESC
Administrators : off
Users : off

————————————————————————————–

4. Start -> Computer 우클릭 -> Properties -> Advanced system settings

‘Performance’

-Visual Effects
Adjust for best appearance -> OK
-Advanced
Processor scheduling
Programs 선택
-Data Execution Prevention’
‘Turn on DEP for essential Windows programs and services only’ 선택

5. ‘Startup and Recovery’
Settings
System failure
Write debugging information : Small memory dump (64KB) -> OK

————————————————————————————–

6. 패스워드 입력하지 않고 윈도 로그온
실행창에 control userpasswords2 입력
‘Users’
Users must enter a user name and password to use this computer 체크해제
체크해제 하기 전에 네모칸 안에 Administrator를 더블클릭 하면 이름을 바꾸기 가능 .
체크해제 후 OK.
패스워드 입력란에 처음 로그인 했을시 입력했던 패스워드를 입력.
밑 칸 한번더 입력.
OK.

재시작…

7. 에어로 설정
바탕화면의 내컴퓨터 아이콘에 대고 오른클릭을 하신후.
‘Manage’를 선택합니다.
Server Manager가 뜨면.
스크롤로 내리셔서 ‘Feature Summary’ 
데스크톱 경헙 추가 & 재부팅
Windows Server 2008 Activation

* 아래 글의 원문 : http://mint770.tistory.com/12

Windows Server 2008의 activation crack 이 몇 종 나와있는데
크랙하지 않고도 인증을 피해가는 법이 있어 적용해보았다.

해보니 참 어이없지만
인증 관련된 파일들을 삭제하는 것만으로도
인증을 우회할 수 있었다.


제품 키 입력 시

Serial Number을 입력하지 않고 진행

“온라인일 때 자동으로 정품인증” 체크 해제

Windows Server 2008 설치 완료 후

SL UI Notification Service를 중지하고, 사용 안 함 상태로 변경

파일 삭제 가능하도록 변경

C:\Windows\System32의

SLLUA.exe
SLUI.exe
SLLUI.ddl

각 파일의 등록정보 > 보안탭 > 고급 > 소유자탭

소유자를 Administrator로 변경


각 파일의 등록정보 > 보안탭 > Administrator 유저 선택

모든 권한 부여

파일 삭제

파일을 삭제하거나 이름을 바꾸어 백업

테스트를 위해 날짜를 미래로 변경

Reboot

PC Off할 때 바탕화면 우측 하단에
“이 윈도우는 정품이 아닙니다”라는 메시지가 나타나고,
컴퓨터 속성에서
“오늘 정품 인증을 받아야 합니다. 지금 정품 인증을 받으십시오”
라고 나오지만,

실제로는 expire되지도 않고
역할 설치 및 Windows Update에도 제약이 없고
로그인 화면부터 막힌다던가 하는 일이 없다.

이상한 프로세스 Groove 없애기;…

언젠가부터 알지못하는 프로세스 GrooveMonitor.exe 가 떴다.
레지스트리에서 삭제해도 ;;; 마치 스파이 웨어처럼 안없어지고..


원문 출처  : http://kita.egloos.com/1971228

Groove는 Microsoft Office 2007의 일부분이다.
(그루브…. 80년대 철부지 힙합그룹 이름같다.)

이것이 하는 일은 폴더 싱크로나이저로 알려져있고, 이것의 백그라운드 실행파일인 GrooveMonitor.exe를 구글에서 검색해보면  ‘어떻게 하면 이 기분나쁜 녀석을 없앨 수 있냐’라는 질문이 많다.

시스템 시작시 GrooveMonitor.exe가 자동시작되지 않도록 레지스트리를 직접 바꿔놓더라도, 마치 스파이웨어처럼 HKCU 레지스트리에 Groove가 다시 등록되어 시스템 시작시 자동실행된다.

이곳 저곳 검색해본 결과, Groove의 삭제방법은:


  • 일단, 레지스트리를 손대봤자 아무 소용 없다.
  • 제어판->프로그램 추가삭제->오피스 2007 엔터프라이즈->변경
    에 들어가서 Groove 컴포넌트를 삭제하면 된다.

답은 정공법이었다…

Fedora 7 이상 버젼을 DVD 없이 CD로만 설치하는 방법

DVD는 2.5G가 넘지만.. CD한장 100메가도 안되는 용량만 가지고 설치할수 있다. 이때 당연히 그 외의 파일은 인터넷에서 가져온다~ 즉 인터넷이 연결되야 한다^^

우선 다음의 주소에서 “
F-7-i386-rescuecd.iso” 이 파일을 받아 CD로 굽는다.
http://ftp.kaist.ac.kr/pub/fedora/linux/releases/7/Fedora/i386/iso/

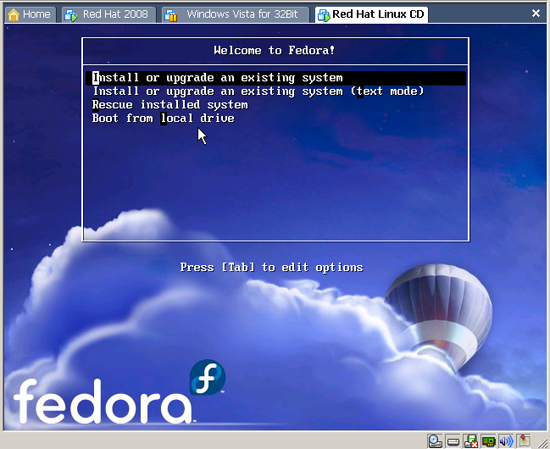
구운  CD를 넣고 부팅한후,

“Install or upgrade an existing system”선택
사용자 삽입 이미지

그리고 그 후에는 적당히 넘어간다.
한국어 선택후.. 적당이 넘어가다가

Installation Method 항목에서 “FTP”를 선택한다.

사용자 삽입 이미지
이후 자신의 네트웍 환경에 맞게 셋팅한다.
나는 고정아이피에 IPV4를 사용하기 때문에 다음과 같이 했당.

사용자 삽입 이미지
이후 내 PC에 IP와 게이트웨이, 도메인 서버등을 설정해준다.

(IP는 보안상 이유로 블럭처리)
이렇게 인터넷이 가능하게끔 네트웍을 설정해주고
사용자 삽입 이미지
이후 FTP주소와 폴더를 입력하라고 하는데..
FTP Site name  : ftp.kaist.ac.kr
Fedora Directory : pub/fedora/linux/releases/7/Fedora/i386/os/

사용자 삽입 이미지

다음 넘어가면 CD 찾았다고 하는데;
CD는 SKIP 하고 ~~~ 넘어간다.

그다음은 평소 설치대로 설치하면 된다.
설치하다보면 “설치를 준비중입니다. 이 단계는 수분에서 수십분이 걸릴 수 있습니다” 라는 메세지가 나오는데;;; 거의 1-2시간 걸린답;; –^

인터넷에서 다운받아 설치해서 그런지 속도는 DVD로 할때보다 훨씬 더 걸리지만 (3시간?).. DVD가 없는 사람한테는 어째튼  편리하다.
DVD 드라이버를 떼서 연결했다 설치하고 다시 떼서 원래데로 붙여놓는 그 노력보다.. 는 간단하기 때문이다.


APACHE에서 PHP 파일을 인식하지 못할때

/usr/local/apache/conf/httpd.conf
파일중..
아래부분에 빨강색 부분을 추가한다.

<IfModule mime_module>
    #
    # TypesConfig points to the file containing the list of mappings from
    # filename extension to MIME-type.
    #
    TypesConfig conf/mime.types


    #
    # AddType allows you to add to or override the MIME configuration
    # file specified in TypesConfig for specific file types.
    #
    #AddType application/x-gzip .tgz
    #
    # AddEncoding allows you to have certain browsers uncompress
    # information on the fly. Note: Not all browsers support this.
    #
    #AddEncoding x-compress .Z
    #AddEncoding x-gzip .gz .tgz
    #
    # If the AddEncoding directives above are commented-out, then you
    # probably should define those extensions to indicate media types:
    #
    AddType application/x-compress .Z
    AddType application/x-gzip .gz .tgz


    # And for PHP 4.x, use:
    AddType application/x-httpd-php .php .php3 .inc .ph .htm .html
    AddType application/x-httpd-php-source .phps


    #
    # AddHandler allows you to map certain file extensions to “handlers”:
    # actions unrelated to filetype. These can be either built into the server
    # or added with the Action directive (see below)
    #
    # To use CGI scripts outside of ScriptAliased directories:
    # (You will also need to add “ExecCGI” to the “Options” directive.)
    #
    AddHandler cgi-script .cgi .pl


    # For files that include their own HTTP headers:
    #AddHandler send-as-is asis


    # For server-parsed imagemap files:
    #AddHandler imap-file map


    # For type maps (negotiated resources):
    #AddHandler type-map var


    #
    # Filters allow you to process content before it is sent to the client.
    #
    # To parse .shtml files for server-side includes (SSI):
    # (You will also need to add “Includes” to the “Options” directive.)
    #
    #AddType text/html .shtml
    #AddOutputFilter INCLUDES .shtml
</IfModule>

ProFTPd 설치 및 실행시… 접속이 지연되는 현상

Proftpd 설치

다음의 주소에서 다운로드

#
ftp://ftp.proftpd.org/distrib/source/proftpd-1.3.2rc1.tar.gz


Proftpd 실행시 Client 접속시 접속이 지연되는 현상.
이는 Proftpd 가 Client 의 접속요구를 받으면, 역방형 DNS를 확인하기 때문이다

proftpd.conf 에 다음의 두줄을 추가

UseReverseDNS                   off
IdentLookups                    off

내가 사용하는 APM 셋팅 옵션

아래 명령어 다운로드
– Command : wget
http://www.lovecoco.net/dataout/userdata/command.txt


MYSQL
– DownLoad : wget
http://www.lovecoco.net/dataout/userdata/mysql-5.1.22-rc.tar

./configure –prefix=/usr/local/mysql –with-charset=euckr –with-unix-socket-path=/usr/local/mysql/mysql.socket –with-mysqld-user=mysql


APACHE
– DownLoad : wget
http://www.lovecoco.net/dataout/userdata/http-2.2.0.tar

./configure –prefix=/usr/local/apache –enable-mods-shared=most –enable-modules=so –with-mpm=worker


PHP
– DownLoad : wget
http://www.lovecoco.net/dataout/userdata/php-5.2.4.tar

WEBDB
– DownLoad : wget
http://www.lovecoco.net/dataout/userdata/webdb.tar


./configure –prefix=/usr/local/php –with-exec-dir=/usr/bin –with-apxs2=/usr/local/apache/bin/apxs –with-apache-install=/usr/local/apache –with-mysql=/usr/local/mysql –with-config-file-path=/etc –disable-debug –enable-safe-mode –enable-track-vars –enable-sockets –with-png-dir=/usr/lib –with-freetype-dir=/usr/include/freetype2 –with-mod_charset –with-charset=euc_kr –with-xml –with-language=korean –enable-mailparse –enable-calender –enable-sysvsem=yes –enable-sysvshm=yes –enable-ftp –enable-magic-quotes –enable-gd-native-ttf –enable-versioning –enable-url-includes –enable-trans-id –enable-inline-optimization –with-iconv –enable-mbstring –enable-mbregex –with-gd –with-ttf –with-gettext –enable-sigchild –enable-module=so   –enable-versioning –enable-url-includes –enable-trans-id –enable-inline-optimization –enable-bcmath –with-jpeg –with-png –with-zlib

make all -> make test 를 실행해야함


# FTP Server Start
/usr/local/proftpd/sbin/proftpd

# MySQL Server Start
/usr/local/mysql/bin/mysqld_safe –user=mysql –language=korean –old-passwords &


# Apache Server Start
/usr/local/apache/bin/apachectl start

비트필드 구조체란?


질문: 비트필드 구조체란? nasanjin / 2007-10-18 18:24

비트필드 구조체란 무엇이며?
어떠한 형태로 사용하며????
사용예제 하나 보여주시고요;;;
사용하는 경우는 어떤 경우인지??
사용하게 되면 좋은 이점은 무엇이며? 단점은 무엇입니가?
메모리 공간은 어떤방식으로 할당하는지???

답변: re: 비트필드 구조체란? keyseek / 2007-10-18 22:41

구조체 멤버를 비트단위로 선언할 수 있는 구조체 입니다.

struct st
{
   unsigned int a : 2;
   unsigned int b : 3;
};

이런 식으로 표현합니다. 즉 일반 구조체의 멤버 산언과 동일하나 멤버명뒤에 : n 으로 비트수를 지정합니다.
예제? 위에 선언한 구조체를 이용하겠습니다.

struct st x = {1,5};

이렇게 하면 x.a는 1, x.b는 5 가 들어갑니다.
즉, a는 2비트인데 1이 들어가므로 2진수로 보면 01 이 들어가게 됩니다.
b는 3비트인데 5가 들어 가므로 2진수로 보면 101 이 들어가게 됩니다
즉, 일반 구조체 사용하듯이 사용하면 되는 겁니다.
사용하는 경우? 뭐 다양하게 사용되겠지만
flag선언때 많이 사용합니다. (이걸 어떻게 설명드리지요?)
또한 어떤 데이터 스트림(헤더정도 등)의 parsing에도 많이 쓰입니다.
예를들어 총 4바이트 헤더에서 처음 3비트는 어떤 정보이고 다음 8비트는 뭐고
그다음 몇비트는 뭐고 하는 식으로 비트들로 필드가 구분되어 있다면
이들 필드들만 억세스 하기 위하여 비트필드를 선언하여 사용합니다.

장점? 아무래도 변수를 비트로 사용하니까 메모리가 줄어들겠죠
예를들어 int a = YES; a = NO; (여기서 YES, NO는 1과 0으로 사전 define된것으로 가정)
이렇게 a가 사용된다면 a는 4바이트 변수인데 실제 저장하는 값은 0 아니면 1 혹은
YES, NO 등 입니다. 따라서 이런 경우는 1비트면 충분하지요
만약 이런식의 변수들이 여러개 있다면 이들을 묶어서 하나의 구조체로 만들고
그 내부 필드를 비트필드로 하는 거지요 그럼 메모리 총량이 감소되어 절약이 가능합니다.

단점? 전체 32비트 메모리(비트필드 이지만 구조체의 최소크기는 int가 됨)에서
특정 비트들만 값을 변경하면 즉 위의 구조체에서 x.a = 1을 하면 실제 이 코드는
1을 그냥 a에 대입하는 것이 아니라 실제 코드는 (x & 3  | 1) 로 처리되어 비트 연산을
수행하게 됩니다. 결국 메모리는 아끼지만 속도는 느려지는 거지요

메모리는 먼저 선언된 멤버가 낮은비트(0번지크)부터 채워집니다.
위의 구조체는 32비트(int)로 총 사이즈가 잡힙니다.

그 32비트에서 하위 두비트 0,1 비트는 a가 그 위의 3비트 3,4,5 비트는 b가 위치합니다.
나머지 비트들은 사용되지 않습니다.

이해 되실런지요?